How to Build a Survival Shelter
For the Most Extreme Survival Situations
There are only a few basic needs that humans have for survival, but one of those is shelter. For your best bet at surviving in the wilderness or during an emergency, you should be prepared to take shelter wherever possible at a moment’s notice.
While you could survive for days without water, and even weeks without food, if your body temperature drops, then you will find yourself in serious trouble. That’s why shelter is so important, and knowing how to build a survival shelter could be life-saving.
The type of shelter you will need to build ultimately depends on your environment. As there are a wide variety of materials available in the outdoors, there are lots of different types of shelters you could build.
In general, the key is to protect yourself as best as you can from the elements, such as rain and snow, but even in hot climates it is important to take shelter.
In this guide, we’ll take a look at some of the most commonly used survival shelters and how to build them, should you find yourself needing to survive.


Clothes and Gear
Shelter begins with the clothes you wear.
When in the outdoors, or if you need to take off at a moment’s notice, remember that layering is essential.
Ideally, you should wear layers of clothing made from wool or synthetic material, and I would highly recommend taking a windproof and waterproof coat for extra protection.
If you find yourself in a hot climate where the sun is shining, still be sure to pack warm clothes with you as best you can. Even the desert can get cold at night.
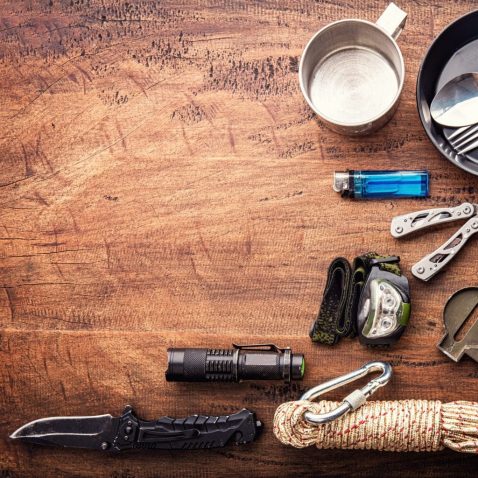
Not only are your clothes vital to temperature regulation, but it is also vital that you have the correct survival gear on hand to help you.
This means focusing on your preparation, and I would advise having a fully packed bug out bag or survival backpack ready to take with you whenever necessary. You can check out our review of the best survival backpacks here.
Ideal, but not essential, items for a survival shelter include a shovel for any potential digging, and a firestarter and blanket to keep warm. Many survival kits come pre-stocked with this kind of equipment.
Planning Ahead
How to Build a Survival Shelter, it’s all in the Planning!
When determining what kind of shelter would work best, there a few factors you need to consider.
Planning ahead will save you time and energy when building your survival shelter.

The most suitable type of shelter will depend on how many people need to take cover. A large group will inevitably require a bigger shelter.
However, if you are alone, then you may find it smarter to opt for a small shelter that needs less material and requires less energy to build.
There is no such thing as a ‘one-size-fits-all’ shelter, so try to learn a few different shelter building techniques, as it’s unlikely you’ll always be stuck with the same amount of people.
Something to factor in that can’t be overlooked is the weather. If you have a weather-tracking watch or compass on hand, as is advised by many expert survivalists, then you can determine whether your shelter needs to be impermeable.
Regardless of whether a storm is oncoming or not, you still need to prevent water from getting through, but if you know rainfall is on its way (or even already happening), then you can determine how much extra material you will need to use.
Another component of how to build a survival shelter is the time it will take. Perhaps there is danger approaching or a hurricane looming, and you need to build as quickly as possible.
Unexpected emergencies mean your shelter will need to be less elaborate in its design, as you need to protect yourself immediately.
The structure of your survival shelter will also be established by how long you need to stay there. If you are planning on one night, then you could save your energy and build a more basic shelter.
However, a long-term survival shelter needs to be as stable as possible, with more emphasis on its outer surface. If you are staying there for an extended period, and the outside of your shelter caves in after a few days, then this will cause more inconvenience.
You would also need to think more carefully about your location and how close you are to any potential hazards.
Depending on the type of survival situation you’re facing, your shelter may need to camouflage as well. Camouflage is especially crucial if you are hiding from enemies, as the threat to your safety is greater than just the weather.
Scoping Out Your Spot
Now that you have assessed the type of shelter you need to build, picking the right spot to set up camp will make all the difference to its stability.
A survival shelter should be built in the driest possible spot, so be sure to avoid any puddles or damp areas. The wet will lower your temperature quickly, and you steer clear of setting up right next to a river or lake for this reason.
As well as being dry, your life will be simplified if you set up on flat land as well. Bumpy or uneven terrain will be more challenging to sleep comfortably on, and can be harder to position materials on when building.
Also, if you set up on a slope or hill, you’re more likely to be impacted by rain and will have less stability during periods of intense wind.
If finding a flat site becomes impossible, then having a survival shovel on hand will help you dig trenches to make sure water doesn’t come into contact with your shelter.
Safety is especially important when choosing a location. Make sure your shelter isn’t directly under or near to any cliffs, or areas with falling rocks.
While avoiding danger as much as possible, your shelter should still be in an easy-to-reach area. You don’t want to be miles and miles away from the nearest body of water, or hidden in a ditch that could cause injury if you’re trying to find your camp in the dark.
If you need to be camouflaged away from enemies, then make sure you are well hidden, but also have your safety in mind when setting up. You shouldn’t put yourself in more danger by hiding away.
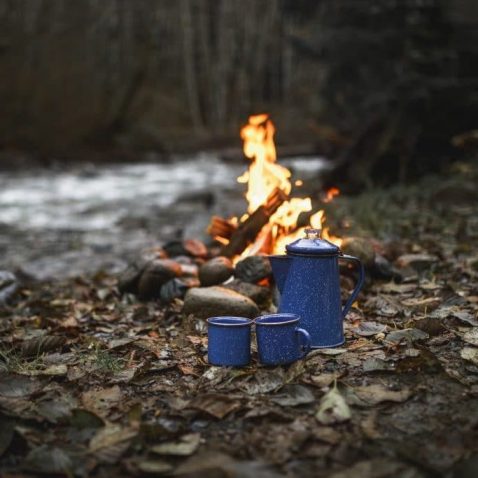
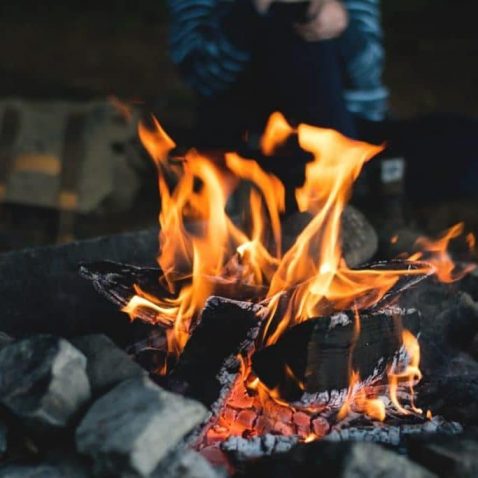
There should also ideally be enough room for you to light a fire so that you can keep yourself as warm as possible during the cold nights.
The Lean-To
If you are a complete beginner to survival shelters, then the lean-to is one of the most straightforward structures you can learn to get you started.
It typically takes less than an hour to build, and is useful to know for one night stays in the wilderness.
The classic lean-to is built using tree branches and outdoor debris, so you don’t have to look too far for the materials. Although best suited for short-term survival, it could be used as a long-term shelter if set up well.
In terms of size, it depends on the distance between the two trees you choose, but a lean-to is typically considered a one-person shelter, especially if you want to lie comfortably. You could fit more people depending on how you position under the shelter.
However, it will not be the warmest shelter, so give yourself enough room to build a fire if need be.
Here are our Step-by-Step Instructions for Building the Lean-To:
1) Find two trees next to each other, roughly 6-8 feet apart, depending on your height. The taller you are, the further away you want your trees to be.
2) Next, look for a sturdy, thick, long branch that is slightly longer than your tree gap in the previous step. We will call this your ‘main branch.’
3) Use a suitable material to tie the branch between the two trees. Rope would be the obvious choice of material if you have it, but cordage from plants could also work.
You could even use flexible tree branches, but these may be unstable. If you don’t have access to any of these things, look at your clothing and see if a belt or shoelaces could work.
4) Assess the wind direction, and if need be, you could use a compass or watch to help you.
5) Gather branches around you, ideally thick, long branches, and lay them vertically on top of the main branch, so that they block the wind. This is the frame of your lean-to.
6) For extra protection, pile sticks, debris, and other outdoor materials on the frame.
7) Now that you’re set-up, start a fire to increase the heat.
And there you have it – an easy to build shelter using only a handful of materials.
The A-Frame
Once you have mastered the lean-to, the A-Frame would be considered the next step up.
It is simple and quick to build, requiring materials that are easy to find in almost all wilderness settings.
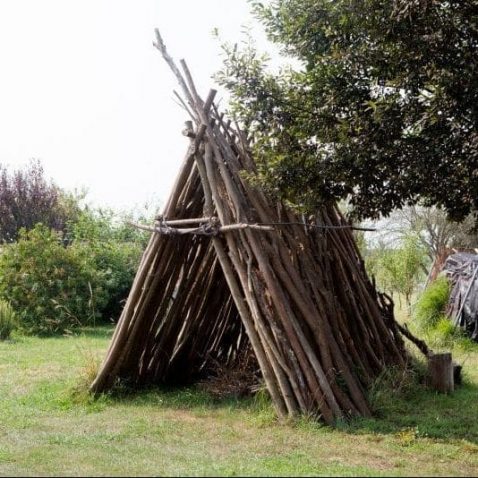
This structure is built using three main branches, with two of them creating the entrance to the shelter. The branches need to be strong and sturdy so that they can support the weight of the shelter.
You have more flexibility with size than with the lean-to, as you can somewhat adjust the width to your liking. You can make a larger structure by building the frame between two trees. Although it would be best suited for one person, depending on the size you could fit a small group inside.
In addition to its easy setup, the A-Frame is also a suitable shelter if you need a hideaway. It blends in well with a wooded area, but can be further camouflaged with debris if need be.
The A-Frame will give you protection against wind and rain for the most part, but you won’t be able to warm a fire inside the shelter. Fires would need to start outside, so if you want to hide from enemies it is not ideal.
How to Build an A-Frame:
1) Look for your branches. They all need to be relatively thick and sturdy. You will need two branches that are between 4-5 feet long, and one branch that is between 10-12 feet long.
2) Place one end of the longer branch against a tree stump or a log.
3) Place the two shorter branches up at the other end of the larger branch, so they form an ‘A’ shape. Consider your spacing here, as your shelter needs to be long enough to fully cover you when you lay down.
4) For the best support, you can prop the larger branch up in a tree if possible. The height of this branch is important, as it will determine the size of your shelter.
5) Where the three branches meet at the end, tie them together. You could use rope or improvise, using flexible branches or plant cordage.
6) Then you need to add the ribs of your shelter. The ‘ribs’ are the branches that will support the walls of your shelter, so they need to be strong.
You want to space them about 6-12 inches apart along the sides of the shelter. Make sure they are roughly equal size in length to prevent an uneven structure.
7) The easiest part of the build is filling in your shelter. Use as many twigs, sticks, and branches that are available to you, and pile them on the frame. They can vary in size and width, but the more space you fill in, the more protected you will be.
8) Finally, you need to make your shelter as resistant as possible to the weather conditions. Use items such as leaves, pine boughs, and moss to bulk out your shelter. This process is sometimes referred to as ‘thatching.’
Snow Caves
It is important to remember that it won’t always be rain or sunshine when you’re in a survival situation.
Sometimes, you’re stuck in the snow, which can make things even harder.
However, if you learn to build survival shelters in the snow, then you can save yourself from worrying about unexpected snowfall. Particularly in deep snow, a snow cave may be your only option for shelter.
You will, of course, need a survival shovel to build this shelter, and many keen survivalists will tell you this should be an essential in your survival backpack.
Due to the conditions, snow caves can be dangerous to create, and they require a level of technical skill to stop the ceiling collapsing.
However, once in place, they make a great structure to shelter you from the thick snow. They are typically large caves, and you can adjust the size accordingly, should you want to fit several people inside.
How to Build a Snow Cave:
1) Find a large snowdrift or deep, solid snowbank. Dig into the side of it to form an entrance, about 18 inches wide and as high as chest level.
2) Then, widen the top of the entrance to form a large T shape, making it easier to dig.
3) You’ll then need to dig several feet further into the drift and excavate the interior of the cave. The floor of your cave should be about waist height, meaning you will be digging upwards and at the sides for most of the building process. The interior will form your sleeping area.
4) Seal the top of the T-shaped entrance using snow and snowballs packed together.
5) Finally, use a pointed object, such as a shovel handle, to pierce several ventilation holes in the top of your cave, at a 45-degree angle to the floor. To seal the tunnel entrance, pack in as much snow as you can, or use a bag of snow.
The Fallen Tree
While this shelter does require a fallen tree, it is a great emergency survival shelter for the wilderness.
It is arguably one of the simplest shelters to build, but it would not be suitable for more than one person in most instances.

By using a fallen tree as shelter, you will be easily camouflaged and blend in with the environment. It also gives surprisingly good protection against harsh elements, and even snow, due to its design.
How to Build a Fallen Tree Shelter:
1) Find a few sturdy, long branches, and lean them against the windward side of the tree. This creates a wall against the tree.
2) Try to make the wall as thick as possible to keep the wind out. Use as many branches and as much debris as you need — the more materials covering your shelter, the better.
3) You may want to start a fire on the open side of the shelter to increase your warmth.
4) Once completed, simply crawl in and get cozy!
As it is such a basic shelter, it is not likely to work well in the long-term. The structure is likely to be unstable, but it works well for one night or if you need to hide out at the last minute.
Using a Tarp for Shelter
For more long-term shelter, consider using a tarp.
A tarp is a large sheet, made from a durable, flexible material, and is water-resistant.
A staple of outdoors and survival activities, a tarp gives you the added bonus of extra protection when building a shelter.

There are a variety of shelters you can build using a tarp. Many of the shelters we have discussed in this guide, such as the lean-to, can be made with a tarp instead of branches.
Tarp shelters are usually preferable for larger groups, as you can purchase large tarps that will shelter more people.
Essentially, you can replace ‘branches’ with ‘tarp’ for most shelters, and the process is the same. However, I’m going to teach you the step-by-step instructions on how to build a Tarp Teepee using poles.
The instructions are as follows:
1) Collect several large branches (which we will refer to as the ‘poles’). They need to be quite long, depending on the size of your tarp.
2) Prop them together diagonally, to form the tepee structure. This process may require a bit of practice if possible, as making this structure sturdy can be difficult. You can tie the poles together, or let your tarp secure them naturally in place.
3) After that, wrap your tarp cover around the poles.
4) Be cautious of rain falling through the gap where the poles meet. For extra protection, place another tarp over this if possible, or use other suitable materials that you may have.
A bonus of this particular shelter is that you can start a fire inside the tepee, making it ideal for especially cold climates.
It will protect you from rain and wind, but bear in mind that it is a more visible shelter than some of the other ones we have mentioned, so it might not be a great choice if you are looking to hide.
Sleeping Arrangements
Now that you’ve built your sturdy and protective shelter, you’ll need to have somewhere to lay your head at night.
You should be aiming to have a good sleep despite the conditions, so you can take on the challenges that face you the next day.
If you don’t have a sleeping bag on hand, then leaves can be a suitable alternative. Or, if you have followed our earlier advice and packed plenty of warm clothing, then you can use certain clothes as a makeshift bed, as long as you are fully covered.
Ideally, your bed should be slightly bigger than your whole body, to give you ample room, and it should be at least eight inches thick for support.
Summary
Learning how to build a survival shelter can seem overwhelming, and it can be scary to imagine yourself sleeping in the outdoors in a makeshift structure.
If you prepare correctly, building a survival shelter shouldn’t be too much trouble, and we hope that this advice gives you the skills to not only take shelter, but to also feel comfortable and safe when you’re stuck needing to survive.
However, preparation is the key, and will save you from panicking should you need to suddenly set up camp. Whether you want to build a winter survival shelter or a long term survival shelter for times of serious disaster, there will be a suitable structure for you.
If you are a beginner when it comes to survival prepping, or you’re a seasoned survivalist, it is never a bad idea to learn about more survival shelters and how to build them.
There is no right answer as to what the best survival shelter is, but there are plenty of excellent survival shelter ideas out there for you to get stuck into.
We hope our guide on how to build a survival shelter has been useful for you and highlighted the importance of shelter in a survival situation. Please comment below if you have any questions or feedback.
If you have any suggestions for topics, please let us know and get in touch with us. We’d love to hear from you!
Good Luck and Happy Survival Prepping!
Share the Love
If you found this post useful, please let others know about it by sharing it.