
In survival situations, you need to have peace of mind that you can rely on your equipment to do the job. Gear breaking down at an inopportune moment can be the difference between life and death.
This is especially true for survival bows; not only are they worth their weight in gold for personal protection, but they can also be used to hunt game for sustenance. If your bow fails to stand up to the rigors of survival, it might not be long before you share in its fate.
The best survival bow has many attributes, and following our review of the best available models, I have composed a thorough in-depth buyer’s guide to help you make your decision.

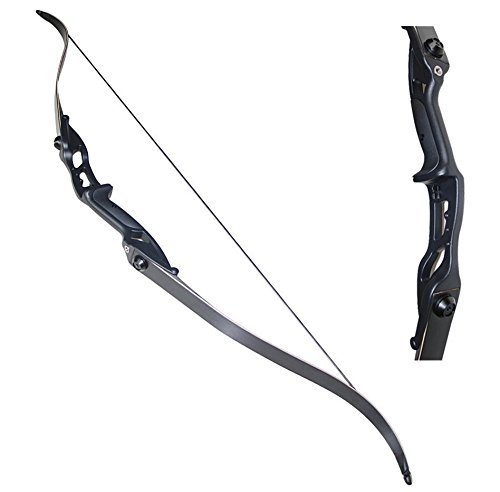
Toparchery Takedown Hunting Recurve Bow

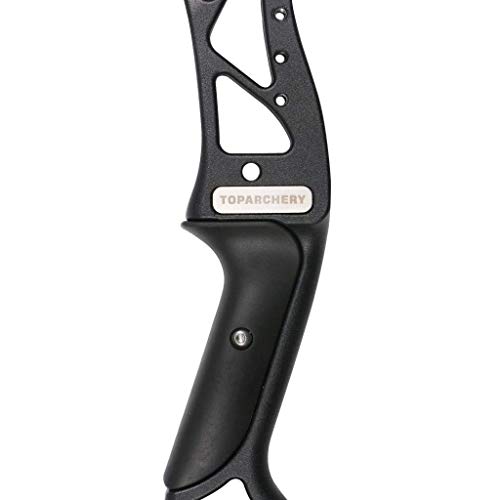
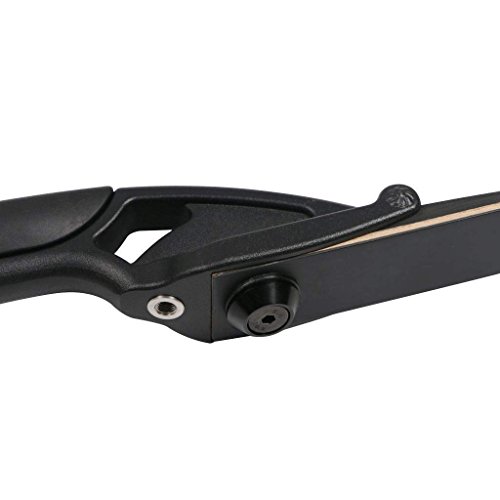
Toparchery has created an affordable takedown recurve bow, with a respectable amount of power. Constructed of aluminum, the riser seems solid, with locations already tapped to attached sights and stabilizers.
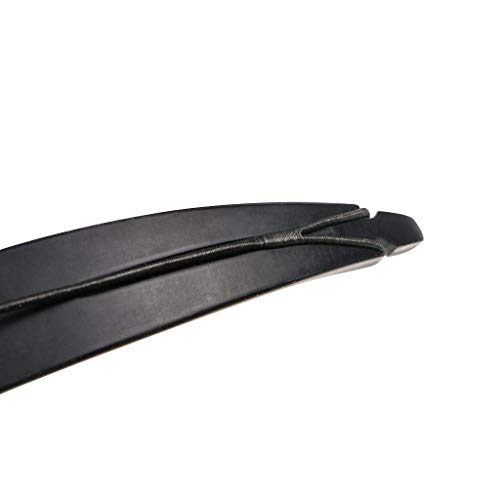
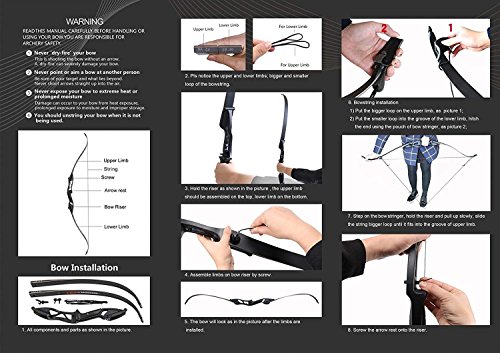
Limbs are composite with a maple center flanked by fiberglass and easily attach and takedown without the need for tools. The bowstringing tool is included in the box, and draw weight starts at #30, progressing to #50 depending on your preference.
Limited by only coming in right-handed orientation, the Toparchery Takedown Bow is aimed at survivalists on a budget.
I wouldn’t make this my primary choice, but if you are budget-conscious or looking for a cheap entry into archery before upgrading, I would definitely consider it.
Read the full post_title; ?> review
Pros
- Budget friendly
Cons
- Only right handed orientation
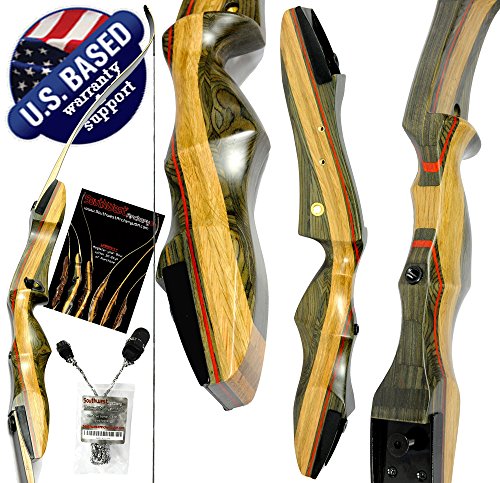
Southwest Takedown Recurve Bow


Many archers claim that the Spyder is an improved version of the Samick Sage, and I am inclined to agree. Heavily inspired by the Sage, Southwest Archery has boosted the quality of the riser and made other subtle improvements too.
The grip profile is slightly different in comparison to the Sage’s, with many user’s conveying their pleasure at how comfortable it remained after long periods of use. Nearly all draw weights come with the appropriate stringer tool, with limbs available in weights from #20 – #60 providing all the necessary stopping power.
Inset bushings are pre-installed into the riser should you want to use accessories with this model. It is worth noting that, as a downside for survival applications, the Spyder is easy to assemble but requires a hex key for the bolts.
While I would typically champion survival bows not necessitating extra tools, as they are easily lost, the Spyder is so good that I would rather have additional hex keys in my kit list.
Read the full post_title; ?> review
Pros
- Reliable
- Well made
- Powerful
- Easy to use
Cons
Samick Sage Takedown Recurve Bow

The Samick Sage Takedown Recurve Bow is the benchmark for takedown recurve bows around the world. Inspiring many manufacturers in their design, the Sage is one of the best-selling bows on the market.
Available in bow left and right-handed orientations, this recurve bow has a high-quality hardwood riser with pre-installed bushings to attach accessories if needed. Draw weights range from #25 – #60, putting the Sage right in that sweet spot for survivalists.
Max draw length is 29’’, which is ideal for most people of average height. If you are particularly tall (6ft2’’+), you may find the Sage a struggle to use. Tools are not required to attach and detach the limbs, and assembly takes no more than 5 minutes.
If you are a survivalist that is inexperienced with bows, I would suggest getting the Sage in a lower draw weight, before upgrading the limbs as you gain strength and proficiency.
Read the full post_title; ?> review
Pros
- Right & left orientation
- No tools required
- A range of draw weights
- Upgradeable limbs
Cons
- Weight might be too much for inexperienced users
- Not budget-friendly
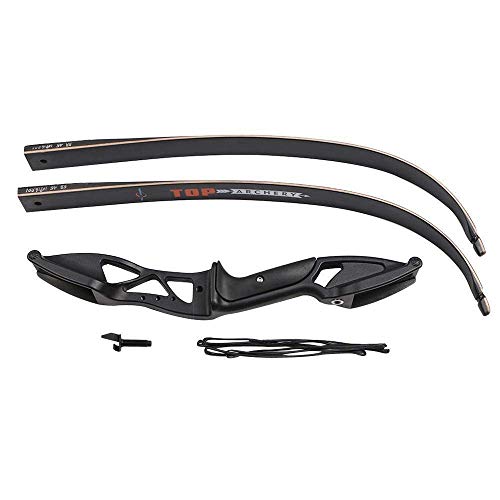
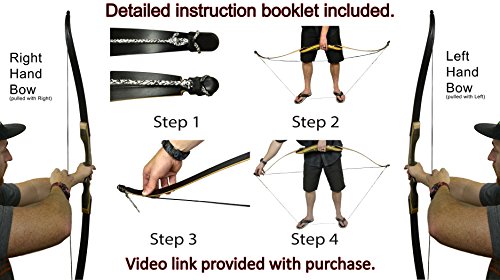
SAS Tactical Survival Bow

Weighing in at a svelte 2.2lbs, the SAS Tactical Survival Bow is the only collapsible survival bow on this list. This weapon system measures just 21’’ when collapsed, easily compatible with even the smallest survival backpacks.
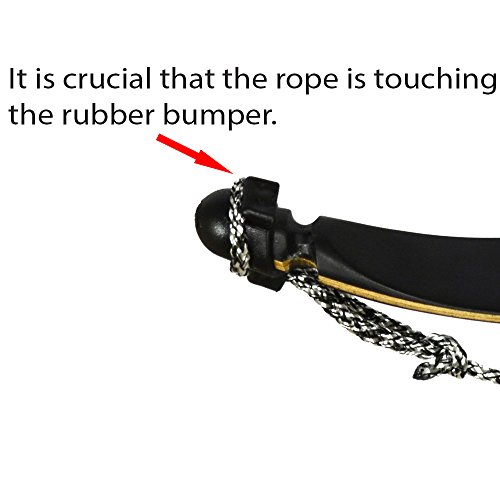
No special tools are needed when converting the bow from storage mode to a usable state, increasing its overall longevity and effectiveness.
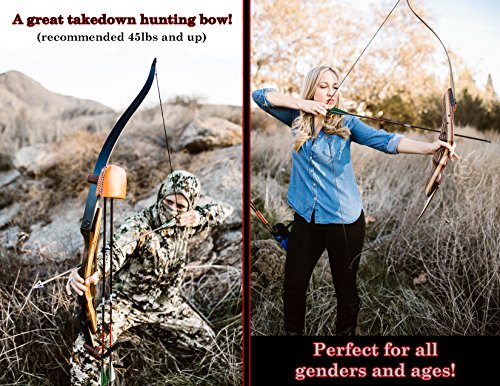
When the SAS Tactical is collapsed, it acts as a storage unit for takedown arrows, keeping them safely stowed away in transit. Deceptively powerful, the SAS provides between #45 and #55 of power, enough to stop an Elk.
Personally, I prefer a wooden riser on my survival bows, to reduce the chance of corrosion. So, while you may not want to rely on the SAS as your primary survival bow, it is an excellent addition to any SHTF or bug-out bag in emergency situations.
Read the full post_title; ?> review
Pros
- Lightweight
- Compact
- No tools required
- Ambidextrous
- Reasonable price
Cons
- Arrows not included
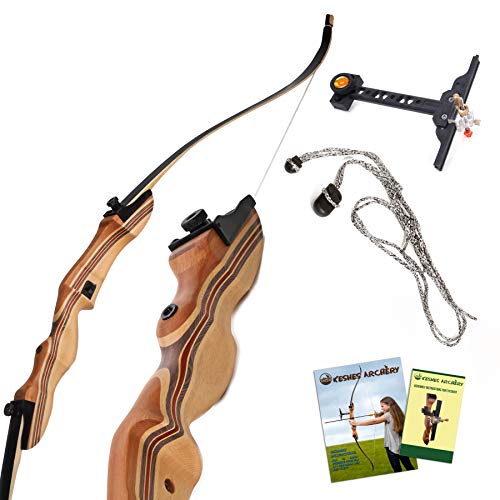
KESHES Takedown Hunting Recurve Bow


KESHES Takedown bow is targeted towards novice bowmen, so if you have no prior experience, this may be the one for you. Assembly is easy with thumb turn bolts to attach and detach the limbs, with no further tools required.
A bowstringing tool is included too, which you will need as the KESHES is available in draw weights up to #55. Greenhorn archers are catered for, with draw weights from as low as #15 ensuring easy entry into the field.
Experienced bowmen will likely want to avoid this model, and new archery enthusiasts will need to note that the limbs can be quickly outgrown.
Read the full post_title; ?> review
Pros
- Beginner friendly
- No tools required
Cons
- Not for experienced archers
Choosing a Survival Bow
Choosing your first survival bow can be a formidable prospect; there is a multitude of brands offering different models, and that’s before you even consider the technical specs.
What is poundage? What does draw length mean, and how will it affect your choice?
No need to fret, I’ve done the research for you and have composed the below buyer’s guide, designed to cut through the mire and get to the critical details you need to know when buying a survival bow.
By the time you’ve finished reading you should be equipped with the basic knowledge required to make an informed decision.
Glossary of Terms
Before we get started with the key factors you should be considering when buying a new survival bow, you will need to familiarize yourself with the basic elements that make up a bow.
Riser: The thickest, central portion of the bow’s body, where your lead hand grips to fire the bow. When looking for a new bow, always ensure the riser is of good quality.
If you purchase a bow with a quality riser, it can last a lifetime, with the limbs getting upgraded as needed.
Limbs: The upper and bottom portions of a bows body. On some models, you can remove/swap the limbs, or they can collapse down for portability.
Most manufacturers use standard sizing when producing their limbs, ensuring many brands are compatible with one another.
Bowstring: The part of the bow used to create the energy required to launch projectiles.
Portability
When looking for a bow to use in survival situations, portability is paramount. Weight and overall size will be critical factors to consider before making your final choice.
Most survival bows are recurved, if so, are they takedown, collapsible, or one-piece? These terms refer to the physical attributes of the bow and how it comes together.
One-piece recurve bows are carved from a single piece of wood, and the limbs cannot be removed from the riser. When looking for survival bows, one-piece bows should be avoided as they offer the least portability.
Takedown recurve bows are bows that can separate the limbs from the riser.
These bows offer the best compromise between flexibility and portability; limbs can be replaced as they break, or to increase the poundage of the bow (power of the bow) and draw length.
Collapsible bows offer the best portability, as the limbs fold down for easy storage.
Some archers have noted that the set-up of collapsible bows can be quite tricky for novice bowmen, but they are unrivaled for the small footprint they offer in your kit.
If you were to ask my advice, I would choose a takedown style recurve bow over any other option.
The customization and ability to replace limbs as they break or for a higher output place them head and shoulders above other models.
Power for Survival Situations
First and foremost, in survival situations, power is king. A bow’s power is known as the draw weight, measured in lbs; the amount of force needed to pull the bowstring back when firing.
Higher draw weights require a respectable amount of strength to operate and command a reasonable length of practice before you can comfortably use them.
With this in mind, takedown recurve bows are ideal as the limbs can be upgraded as you grow in strength and expertise.
Limitations on draw weights you can use will depend on your age, frame, gender, and experience.
For survival purposes you should have a bow with a draw weight capable of taking down large game if need be, roughly 50lbs (expressed as #50).
Outlining ideal draw weights can be difficult without first-hand experience but here is a rough outline of beginner draw weights:
Youth archers – #15 – #30
Females over 21 – #20 – #35
Males over 21 – #25 – #40
Nearly all manufacturers that produce takedown recurve bows offer draw weight options ranging between #5 – #100. Higher draw weights demand more energy to use and will result in early fatigue if you are not prepared.
Draw Length
The draw length of a bow is how far the bowstring can be pulled back before you fire. Before you purchase a new bow, you will need to know what your draw length is, as it is based on the user and not the bow.
The easiest way to find out the ideal draw length for you is to visit your local bow tech and get accurately measured.
Of course, this isn’t a viable option for everyone. Thankfully, there is a simple way to get a close estimate.
First, you will need to measure your height in inches, then divide it by 2.5.
If you are 5ft11’’ tall, your height in inches is 71. The draw weight can then be worked out like so:
71 / 2.5 = 28.4 inches
To make it easier, we would round the end result down to 28 inches. Now when you are looking for an appropriate survival bow, you can check that it is suitable for up to 28’’ of draw length.
Bow Length
Most bow creators advertise the draw length of their bows, but if the information isn’t available, it is possible to determine a rough estimate based on bow length.
Draw Length Bow Length
14-16’’ – 48’’
17-20’’ – 54’’
20-22’’ – 58’’
22-24’’ – 62’’
24-26’’ – 64-66’’
26-28’’ – 66-68’’
28-30’’ – 68-70’’
31’’+ – 70-72’’
These numbers aren’t the gospel truth, but they are a relatively accurate starting point. Only experience can truly tell you what is best for you, and many archers are proficient with bows slightly longer or shorter than these estimates.
One thing to keep in mind is that if you do opt for a longer bow length, every inch above the recommended amount adds 2.5lbs of draw weight.
Durability
Survival situations will test not only your personal limits but the limits of your gear. Adverse conditions and climates demand equipment that can stand up to these rigors.
A bow may be your only method of protection or source of nourishment, making it vital that it lasts. Modern bows may lose points here, being susceptible to rust and corrosion.
Takedown bows with a traditional wood riser are ideal, they can survive knocks and scrapes with ease, with little chance of corrosion.
Wooden riser’s may be open to damage from damp, so you should see if they are treated for water resistance from the factory, and if not, apply some yourself at home.
Accessories for Survival Bows
Learning to use a bow au naturale is the best way to prepare for survival situations as accessories only add extra weight. With that said, there are a few bow accessories that can improve your experience:
Quiver: While a quiver has the potential to be cumbersome and heavy, some will prove invaluable. Arrows will need storing safely, with easy access.
I would recommend a quiver that attaches to the hip rather than a back-mounted quiver. There are some bow-mounted quivers available, but these may interfere with your line of sight.
Armguard: All archers should have an armguard or two, but having one on hand will save you from unnecessary injury during survival situations.
Gloves: Archery can be tough on your hands, from the pressure of holding the bow, to the string causing blisters on your drawing hand.
A good pair of archery gloves will now only provide comfort but avoid the chance of blistering on your finger’s leading to infection.
Sights and stabilizers should be avoided; they add unnecessary weight and are easily broken. If you must have a sight or stabilizer, it is worth paying the price for high quality, durable accessories that will last a long time.
Recurve Bow vs. Crossbow
Many people praise crossbows as the best survival bows, and they do have some merits. Crossbows are easier to use without any experience, and if pre-cocked, they are faster on their initial shot.
But that’s where the advantages end, most of the crossbows available today are much heavier in comparison to a recurve bow. Not only that, but there are many more moving parts that are likely to break or wear down over time.
Lining up a second shot is much faster with a recurve bow, and some crossbows even require a hand crank to make ready again.
While the entry-level of skill needed to use a crossbow is much lower, with minimal training you will find that a traditional bow is far more effective and efficient to use.
Assembly
Assembly and breakdown should be easy, preferably without the need for additional tools. The more pieces that are required to assemble the bow, the more pieces there are that can break or go missing.
Recap
Quality equipment is vital in survival situations, and you always want the best gear that can survive alongside you.
For these reasons, my choice is easy; despite needing a hex key to takedown/assemble, I would undoubtedly choose the Southwest Archery Spyder over the other models.
Solidly built and sure to last, the Spyder delivers all the power you could need in a survival bow. Just be sure to have an extra hex key or two on hand.
Do you agree with my choice for the best survival bow? Have you used any of the bows in this article? Let me know in the comments below.
I am always looking to deliver the best, most relevant content for survival enthusiasts like myself. So if you have any topics you would like to see covered, please get in contact below.
Share the Love
If you found this post useful, please let others know about it by sharing it.